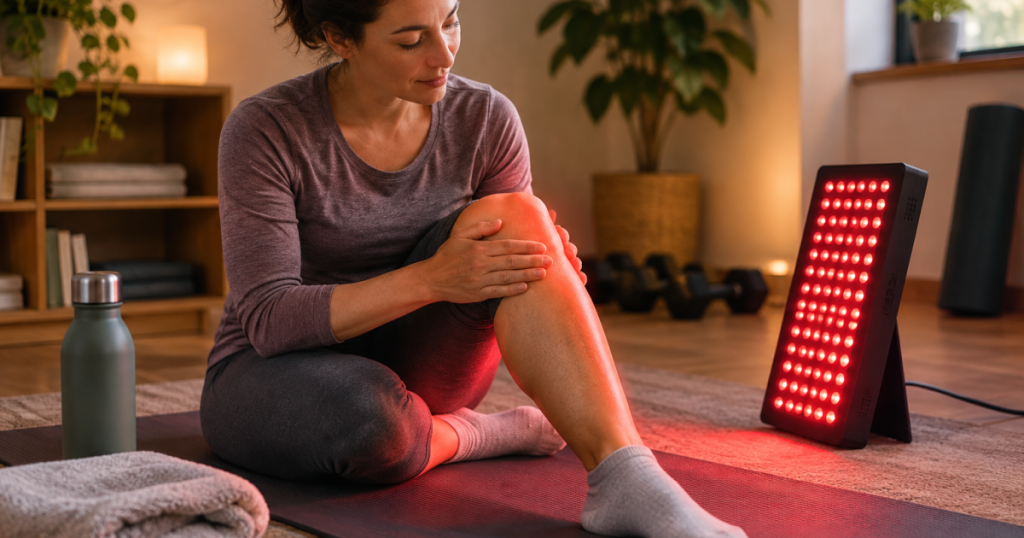
When a knee feels wooden after squats, running, travel, or a long desk day, the goal is not to blast it with light and hope for magic. A red light panel for knee stiffness is best used as a comfort-and-routine tool: position the panel around the joint, keep the session conservative, and pair it with gentle movement so the knee actually gets a chance to loosen up.
The routine below is built for minor stiffness and everyday joint discomfort, not injury management or medical treatment. Think of the panel as one part of a recovery corner: light, movement, hydration, sleep, and sensible load management all matter.
Professional guidance: Diagnosis and treatment of knee pain, swelling, injury, locking, instability, or persistent joint symptoms should be handled by a qualified healthcare professional to meet appropriate clinical standards and local care requirements.
At a glance
- Use the panel before easy mobility work, after a workout cooldown, or during a low-friction evening routine.
- Position the knee so the front and sides of the joint receive light; rotate your leg or body if your panel is narrow.
- Follow the panel maker’s distance and session-time guidance, starting at the lower end until you know how your skin and joint respond.
- Do not use light as a reason to train through sharp pain, major swelling, heat, redness, or a knee that feels unstable.
- Track comfort, range of motion, and session consistency instead of expecting a dramatic one-session change.
First, decide what kind of stiffness you are dealing with
A light routine makes the most sense for mild, familiar stiffness: the knee feels tight after activity, slow to warm up, or a little cranky after sitting. That is different from a new injury, a swollen joint, or pain that changes how you walk.
Pause the home routine and get medical evaluation for red flags: a recent fall or twist, inability to bear weight, significant swelling, fever, spreading redness, calf swelling, numbness, a locked knee, or pain that is worsening rather than settling. A red light panel is not a diagnostic tool, and it should not be used to talk yourself out of care when the knee is clearly asking for more than a wellness ritual.
Set up the space so the session is easy to repeat
The best routine is usually the one you can perform without rearranging half the room. Sit on a stable chair, bench, or mat where the knee can stay relaxed for the full session. Keep the panel secure, cords out of the walking path, and the controls easy to reach before you start.
If your panel needs to be farther from the outlet, read the extension cord and power strip guidance before improvising. Recovery routines are better when they do not involve tripping over a cable in socks.
Use protective eyewear if recommended by the manufacturer or if the light is uncomfortably bright. Near-infrared light may appear dim or nearly invisible even when active, so do not use visible brightness as your only cue for intensity.
Position the panel around the knee
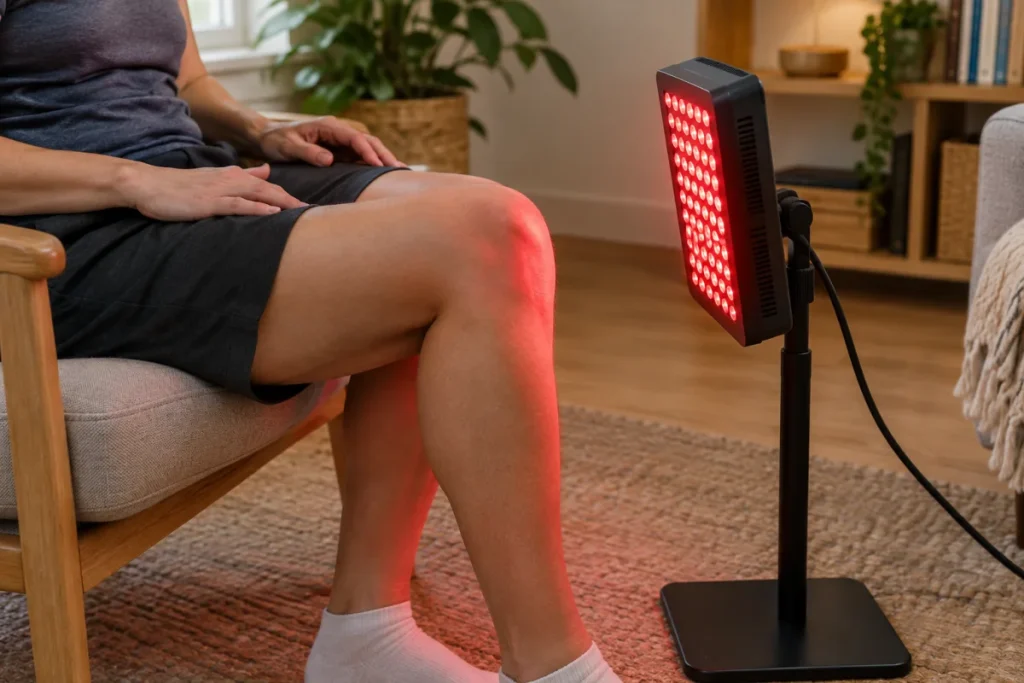
For knee stiffness, the simplest setup is a seated front-of-knee position. Place the panel so the light faces the kneecap and surrounding tissues, keeping the distance within the manufacturer’s suggested range. If the brand gives a distance range, start toward the farther end and shorten only if the session remains comfortable and within the device instructions.
Front of the knee
A front-facing position is easiest for most people because the kneecap, quadriceps tendon area, and upper shin are exposed without twisting. Wear shorts or loose clothing so fabric is not blocking the light. Keep the joint relaxed rather than locked straight.
Inside and outside of the knee
Stiffness often feels more noticeable along the inner or outer joint line. After the front exposure, turn your leg slightly or shift your chair angle so one side faces the panel, then repeat on the other side if your session plan allows. This is where a half-body panel can be convenient because it gives you more coverage without needing perfect aim.
For example, a panel in the half-body category such as the Mito Red Light MitoPRO 750X is the kind of format readers often compare when they want enough coverage for knees, thighs, shoulders, or similar recovery areas. The exact routine still depends on the manufacturer’s instructions, not the category label alone.
Back of the knee
The back of the knee is trickier because the area is more sensitive and awkward to position. If you include it, keep the knee comfortably bent, avoid pressure behind the joint, and stay conservative. Skip this angle entirely if there is swelling, vascular concern, unexplained calf pain, or any symptom that belongs in a medical evaluation.
Use conservative timing before chasing intensity
More is not automatically better. Red and near-infrared panels differ in wavelength mix, irradiance reporting, beam angle, and recommended distance, so a session length from one brand should not be copied blindly to another. Follow your panel’s manual first.
A sensible starting approach is to use shorter sessions for the first week, watch your skin response, and notice how the knee feels later that day and the next morning. If you feel warmth, mild relaxation, or no obvious change, that is within the normal range of user experience. If the joint feels irritated, the skin feels overly warm, or discomfort increases, reduce exposure or stop and reassess.
If you have reactive skin, medication-related photosensitivity, or a history of flushing, borrow the cautious mindset from routines for sensitive facial skin. The site’s guide to using a red light panel with sensitive, rosacea-prone skin is face-focused, but the gradual-start principle carries over well.
Pair the panel with gentle mobility
Light sessions are most useful when they fit into a sequence that encourages movement. For many home users, the smoother pattern is light first, then mobility. The panel session becomes the quiet reset before asking the joint to move.
- Before the panel: Walk around for a minute or two and note your baseline stiffness. Do not force deep bends cold.
- During the session: Keep the knee relaxed. Avoid aggressive stretching while you are trying to maintain consistent positioning.
- After the session: Try easy heel slides, gentle quad sets, slow bodyweight sit-to-stands, or a short walk if those movements are already comfortable for you.
- After training: Cool down first, then use the panel as part of a calmer recovery block rather than as a substitute for load management.
The point is not to prove toughness. It is to make the next normal movement feel less guarded.
Common mistakes that make knee sessions less useful
- Changing everything at once: If you add a new supplement, new running plan, new mobility drill, and a panel in the same week, you will not know what helped or irritated the knee.
- Using pain as the main dosing guide: Minor comfort changes are useful feedback, but pain can be inconsistent. Track stiffness, stairs, range of motion, and next-day response too.
- Sitting too close too soon: A closer position is not automatically a smarter position. Respect the manual and build gradually.
- Only lighting the exact sore spot: The knee works with the thigh, hip, calf, and ankle. Your movement routine should reflect that broader chain.
- Expecting treatment-level certainty: At-home panels may support a recovery ritual and temporary comfort, but they should not be framed as a cure for joint disease or injury.
When panel size matters
A compact tabletop panel can work for one knee if you are patient with positioning. A half-body panel is easier when you want to cover the knee plus part of the thigh and shin without constant adjustments. A larger full-body panel can be convenient for people combining knee sessions with broader recovery routines, but it also asks for more space and a more deliberate setup.
Another half-body option readers may compare is the Hooga Ultra 750. Instead of treating model names as shortcuts for results, compare practical factors: coverage class, listed wavelengths, mounting options, reported irradiance method, dimensions, weight, and how easily the panel fits where you actually recover.
How to track whether the routine is worth keeping
Give the routine enough consistency to evaluate it, but keep the bar realistic. Use a simple note on your phone or training log with four fields: session date, panel position, mobility work, and how the knee felt during ordinary tasks later. Stairs, getting out of a chair, walking after sitting, and the first few minutes of a workout are more useful signals than a vague “better or worse.”
If nothing changes after a consistent trial, the routine may not be the right lever for that knee, or the bigger issue may be training load, footwear, strength, mobility, sleep, or something that needs clinical attention. That is not a failure; it is useful information.
Follow-up questions
Should I use red light before or after stretching?
For stiffness, many users prefer light first and gentle mobility afterward. Avoid intense stretching just because the knee feels warmer or looser; stay within movements that feel controlled.
Can I use a panel every day?
Follow the device instructions rather than assuming daily use is required. If you are experimenting with frequency, change one variable at a time and watch for skin irritation or increased joint discomfort.
Do I need near-infrared for the knee?
Many recovery-focused panels combine red and near-infrared wavelengths, but product designs vary. Near-infrared is commonly included for deeper-tissue-oriented use cases, yet that does not guarantee a specific outcome for any individual knee.
Main lessons
Use the panel calmly, position it thoughtfully, and let gentle movement do its share of the work. The most credible knee routine is not the most intense one; it is the one that respects symptoms, follows the device instructions, and fits into the recovery habits you can repeat without turning your living room into a lab.